Instructional Video Time Wasters
Instructional video time wasters – video is easy to make, right? Not always. In fact, many trainers find it takes longer to make video than they expected.
A lot of things can slow us down. But they don’t have to. Here are three ‘time wasters’ that hold trainers and training departments hostages to the tyranny of time and prevent us from making instructional videos as fast as we can.
- Lack of editorial clarity
- Poorly produced shots
- Lack of preparation
No, these aren’t the only timewasters. But they’re the most common I see around the globe as I run workshops and coach trainers in how to make instructional videos. You can learn about them in my books Rapid Video for Trainers and Rapid Media for Trainers. But for now, I’m going to dig into these ones.
 Lack of Editorial Clarity
Have you ever found yourself in a team meeting, planning instructional video content? You’re seated around a conference table and Kelly says, “Gee, why don’t we get a shot of an old dude shuffling around the campus – it could be, like, really good – and he’s clutching a tatty old manila folder with the logo on it.” Your colleagues become animated as they see the ‘art’ in the shot. So, it’s added to the shot plan. Then Alec suggests time-lapse photography. His hobby is nature photography and he has wanted to do something like this for a while. Folks agree it could create a nice ambience.
Having art in your shots or creating nice ambience aren’t bad things in themselves. But should they be the primary reason to feature a scene or adopt a visual technique? Planning your video without checking how each idea supports the learning objective can create issues down the line. Such as elements of a video going in different narrative directions. And sometimes having elements undermine the central objective. When this happens, more time is spent adjusting it downstream, rather than getting it right first. A strong learning objective and knowing who your learner is (by creating a persona) will speed up your planning and keep the content focused. The stronger the objective, the better.
I always urge folks to follow Mager’s grammar of writing learning objectives (action, condition and standard.) Such clarity prevents you spending valuable energy on ideas that don’t support the objective and may ultimately be dumped. It’s important you create the objective before you do anything else. And to keep the content clear, keep it to one objective. CLICK HERE for more on that.
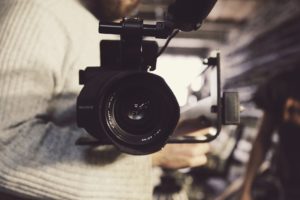 Poorly Produced Shots
Picture this: it’s 2pm and you’re at your desk about to edit a video you shot. It needs to be turned around fast because your boss wants to show it to some important internal stakeholders at a meeting tomorrow at 11am.
That’s fine because the video is only 2 minutes. Until you load the footage into your editing software. Half of it is washed out – under exposed. Some of it is out of focus – blurry. And one or two tracks have very low audio.
Not a problem, right? You’re in Adobe Premier and there are tools you can use like contrast and brightness. Sharpening. And audio compression. But here’s the deal. Correcting poorly shot footage takes time. And sometimes, poor footage – like blurry shots – can’t be fixed and need to be re-shot.
Take brightness and contrast – adjusting them sounds easy. But, fixing a few under-exposed shots could add ten to twenty minutes of work to a small project. It involves tweaking the settings, reviewing them, making other adjustments and it is simply very fiddly. It’s fiddly because as easy as adjusting these controls are, the results often look very fake.
A few years ago, I was asked to edit a two-minute microlearning video. I put aside four hours to do it. My client’s friendly videographer – who I later learned was really a photographer – passed on the footage with a note that read, “I haven’t done the sharpening yet, so the footage is still a little blurry.” You wouldn’t want to see what he sent me. Some shots were unsalvageable. And the shots I could improve, took me three hours to clean up. The others had to be re-shot which put editing back a few days.
Think about this – I wasted three hours and the project was put back a few days because they had to re-shoot the footage – before I could get to the creative stuff. The crazy thing about this is that this could all be avoided by getting good shots in the first place. And with practice, good shots are easy. I was demonstrating white balance to a participant in one workshop. He said, “Wow, I always white balance in post.” I asked him how long it took him to white balance a shot in post. “Oh, a few minutes.” Setting the white balance correctly on the camera takes less than 30 seconds. It doesn’t seem a lot at first. But if you have 20 shots, that’s less than ten minutes with the camera versus 40 minutes in post.
I share the “5 Ites” model for shooting video in my workshops. This simple 5-step process ensures you get professional looking shots. After a little practice, the whole sequence – which involves more than just white balancing the camera – will take you 90 seconds and save many minutes in the edit. CLICK HERE for more on the “5 Ites” at ATD’s website.
 Lack of Preparation
A few years ago, I was scheduled to perform a ‘piece to camera’ for an instructional video. To be consistent with the topic, we decided to shoot it in the public square of a local town.
I asked our producer in the production meeting, “Do we have a permit to film in front of the fountain?” She shook her head. “Not a problem – everyone films there.” I must have looked like a doubting Tom because she got serious and insisted it wasn’t going to be a problem.
Well, yes, you guessed it, it was a problem. The following day, as I stood near the fountain being ‘mic-ed’ up, the police arrived and asked us to leave. The whole morning was wasted as the producer hunted for another location.
A common timewaster when making instructional video is poor or lack of preparation. Sometimes we simply don’t think of everything. Other times we’re lazy. And at other times we don’t take time to check things.
Preparation starts with people. Who is responsible for each task? Are some of your colleagues going to be actors in the video? Or demonstrate certain tasks? Do they know where to go? How to dress? What do to do? When to turn up? Will your SME be on hand to ensure content is correct?
Preparation involves equipment. Are the batteries charged? Is there enough space on the SD cards? Do you have the tools to ensure lighting cables don’t trip anyone? Are the mics working and do they have fresh batteries?
Preparation includes logistics. Do you have a shot plan? Do you have permission to film? Did you scout the location? Have you done a risk assessment? If several team members share the same equipment, have you made sure someone else won’t have your camera?
There’s a lot to remember when you shoot instructional videos. CLICK HERE for a quick overview. So, the more you can prepare for production, the fewer problems that will crop up. And when you do turn up to shoot, instead of fighting fires, you’ll have the mental bandwidth to focus on being creative.
Avoid These Time Wasters when Making Instructional Video
If you want to shave time off the production process, as well as improve the quality of your instructional videos, avoid these time wasters. They will make a big difference.
If you’d like to learn more about them, check out my book, Rapid Media for Trainers. Or join me in Washington DC on 17 and 18 May for a 2-day workshop on making instructional videos. It’s an ATD Certificate Program based on my book and offered as aprt of ATD’s Annual International Conference and Expo. There are still four spaces on the workshop, as I write. CLICK HERE for details.






Comments are closed.