You don’t need a lot of money to start podcasting. However, there are some essential tools you’ll need to buy.
Article in Brief
- Pre-packaged podcasting kits
- Microphones, hardware and software needed to produce podcasts
- Room and acoustics issues for getting the best sound
Your Podcast Studio Toolkit
To produce a podcast, you will need some hardware and software. These include:
- Microphone (If you have multiple microphones, you’ll also need a mixer.)
- Headphones
- PC with sound card
- Audio editing software
If you are really serious, you could add the following tools to your tookit:
- Portable audio recorder to conduct interviews on location. (Preferably with an external microphone)
- Telephone recording hybrid or computer software to record conversation
- Acoustically treated room or sound booth
Complete kits
A number of manufacturers offer all-in-one podcasting kits. These generally include a microphone, mixer, and headset, along with software to record and upload your podcasts.
These kits can save you the trouble of looking around at different specs to ensure all of the different pieces of gear work and plug together.
However, I think you can gain greater flexibility and save some money by bolting your studio together on your own.
 Tools of the Trade
To create a podcast, you need a microphone, set of headphones or loud speakers, a computer and an editing software package. You will also need a space that’s ideal for recording.
If you want to be more sophisticated, you could benefit from an audio recorder (or audio recording app on your smart phone) and a telephone interview recording device.
Let’s look at each of these.
Microphones
The purpose of a microphone is to make you sound natural. But, every microphone is different. Put the same voice on two different mics and you’ll often notice a significant difference.
This is because different microphones have different dynamics and everyone has a unique mouth shape and way of using breathing and lips to shape their words.
The first piece of advice when buying a mic is to avoid a headset microphone. The second is to not buy a domestic microphone. These are usually made of cheap plastic and have low quality diaphragms..
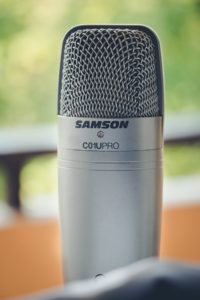
Instead, look for what’s called a “large diaphragm studio condenser” microphone.
Look at also purchasing a foam windscreen or a pop filter to help reduce plosives and the sound of breathing. And buy an isolated microphone stand. (These two accessories often come with the mic.)
Studio condensers sell for between $50 and $70. Look for brands like Behringer, Samson and Audio Technica.
Headphones
It’s imperative to listen to your recording to monitor how you sound, gauge the best position for the microphone in relation to your mouth and get a sense of what your listener will hear. You also need to listen to adjust things like EQ and add compression. Computer speakers usually don’t offer the quality you need. Make sure your headphones are clear quality and sit comfortably on your head. If they’re too tight it makes using them for long periods of time difficult.
A Computer
You need to record your podcast. Most will record it on a computer using audio editing software. Most consumer computers today have decent sound cards but a few years back we used to tell folks to check the specs of them.
You may choose to use an app on your phone or tablet to record and edit your software.
Audio editing software
As mentioned earlier, you will need audio editing software to record and edit your audio. There are many software options to choose from.
High-end audio enthusiasts root for Pro Tools, but for a simple podcast, Pro Tools is way over the top and best left for the audio engineers doing Hollywood soundtracks.
We suggest you download and use the free editing software, called Audacity.
There are two very compelling reasons for recommending Audacity. First, it has all the functionality you’ll need. Second, it is free and you can download it from the Internet. (Just type audacity into google and you’ll find it quickly.)
 Portable Recorder
If you want an edge with your podcasts, chances are you’ll have location interviews with SMEs. For this, you’ll need a digital recorder.
In the old days, interviews were recorded on used Nagra tape recorders, and Sony professional cassette recorders and Marantz Superscopes. Today we use solid state recorders.
Nagra, Marantz and Tascam offer models that connect to your PC via USB or memory cards. These brands have long been associated with broadcasting.
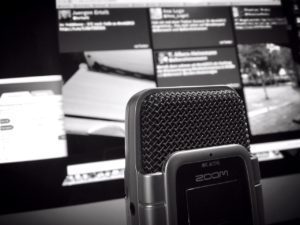
However, there are a number of really affordable recorders available today that we readily recommend. They include the Zoom H2n which is cheap, easy to use and records really good quality audio.
Telephone Recorder
The final piece of equipment that you may consider buying is a telephone hybrid. This is a box that connects your telephone to a recording device.
Radio stations use Hybrids because it eliminates the feedback loop that occurs when recording telephone conversations.
You can buy a lower-end hybrid for $250 to $300. It guarantees an excellent quality of audio. And your guest will hear any music or other audio you are playing as well as your voice.
However, there is another cheaper alternative you may use. You can conduct your interview on Skype and use a software package to record it.
There are several software packages available. Two of them are “Pretty May” and “Pamela”. At print, the offer a free version which allows you to record up to 15 mins.
One caution about using telephone interviews. To sound professional, do not use a headset mic but a proper studio condenser as we’ve discussed above.
It does not matter what mic your guest uses but you want to sound as if you’re in the same room as your listener.
 Room
Room
You can create a podcast from anywhere. However, the acoustics in the room you record it can make it sound professional or unprofessional.
If you’re recording in an office or at your home, the chances are that there will be an echo. Echoes are also likely in rooms with no furniture, shiny surfaces and parallel walls and ceiling create an echo.
The reason for this is that the walls in most conventional rooms are parallel. Unless it has a cathedral ceiling, the floor and ceiling are also parallel. Often the walls have reflective surfaces like glass in windows. These all reflect sound which bounce back and forth causing an echo.
That’s why it’s good to either treat your room acoustically, or find a room with an irregular shape that has furniture and other items such as curtains to absorb the sound.
Treating your room is a complex process. There are two issues to consider. One is sound proofing. The second is acoustics. Most people think they are the same thing but they’re not.
Soundproofing is usually achieved by making walls and ceilings thicker. People stuff walls with fiberglass batts or expanding open cell spray foam to slow down the transport of sound waves. They seal windows so they’re air tight and double glazed.
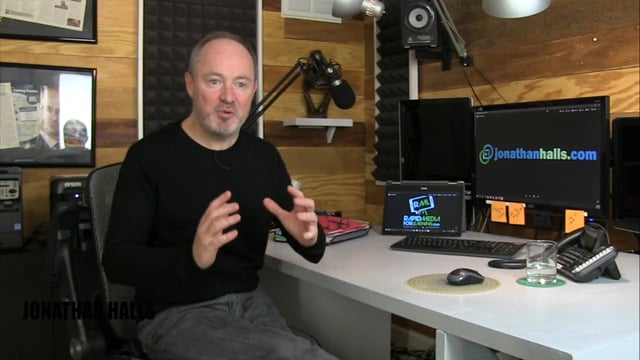
Acoustic treatment usually comes by way of acoustic foam (not spray foam but specially molded foam which) which both reflects the sound at odd angles so it doesn’t bounce back and absorbs some of the sound to reduce the echo. Shown in this picture on the left is acoustic foam we use in our studio.
Treating your room is complex and I’ll be adding some resources to this site in the future to help you get a grip on it.
Your Podcast Studio
You don’t need a fully-fledged radio studio to create compelling podcasts. But you do need certain tools to create that content. These include a microphone, headphone/speakers, computer and editing software. You also need to find a quiet room that does not echo.
If you want to take your podcasting up a notch – and I recommend you do – buy a portable audio digital recorder and get some software to record interviews using Skype.
A further investment of treating the room you record in will help improve the sound too.
![]()

![]()



Comments are closed.